
Fade Cues are fantastic for live performance because they’re flexible – they can be executed in light of what is happening on stage; they’re not tied to the timing of the song or sound effect. But sometimes you want to raise or lower volume at a specific moment in a sound or piece of music. For example …
This is the roll of Integrated Fades, meaning the raising and lowering of the volume is integrated into the Audio Cue itself.
To enable Integrated Fade, go to the Time & Loops tab of the Inspector and enable Integrated Fade. You’ll see a yellow line appear in the waveform, which is a visual representation of the audio file – volume / sound over time.
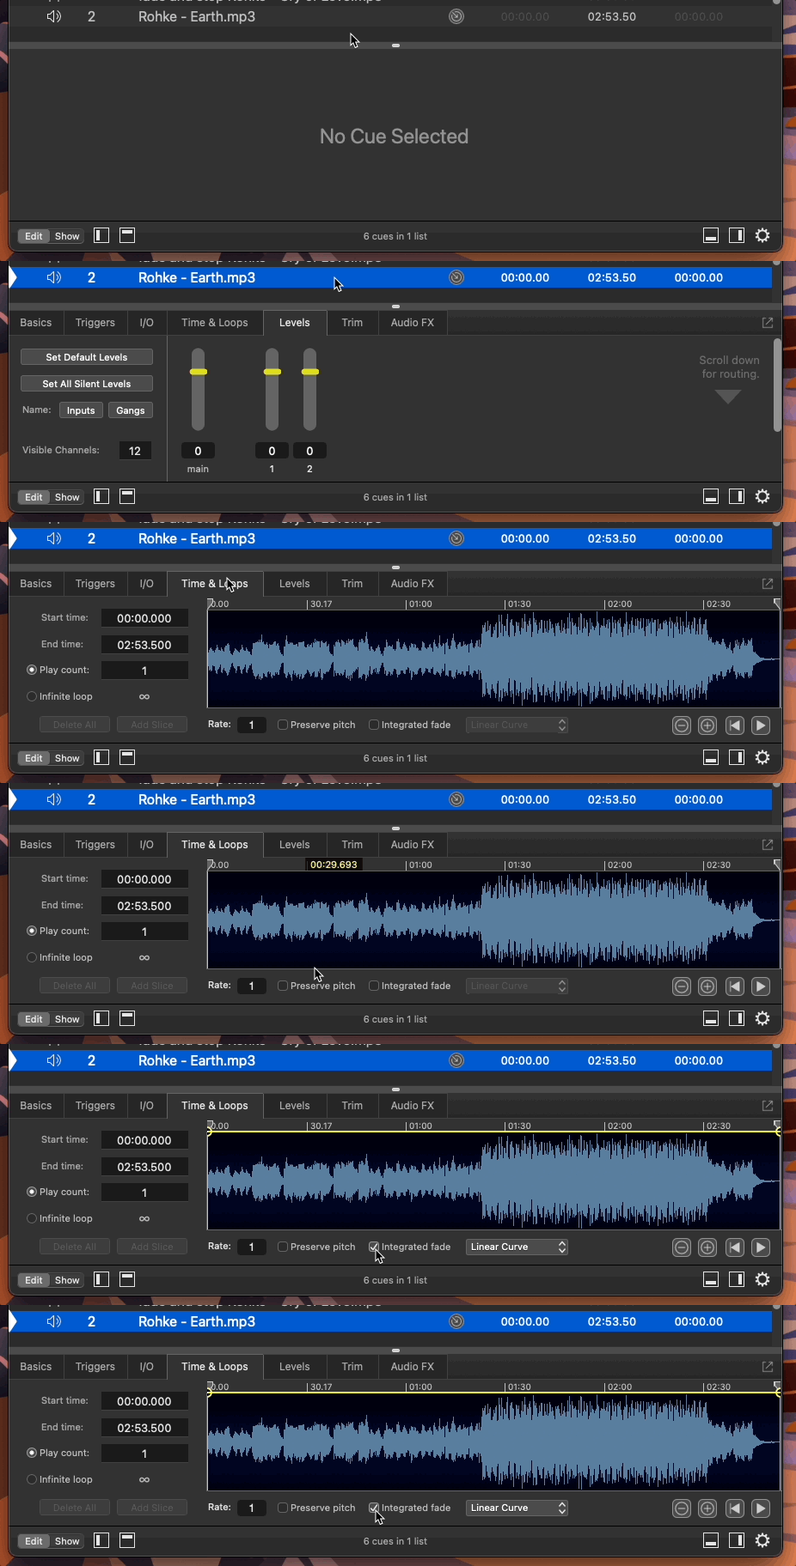
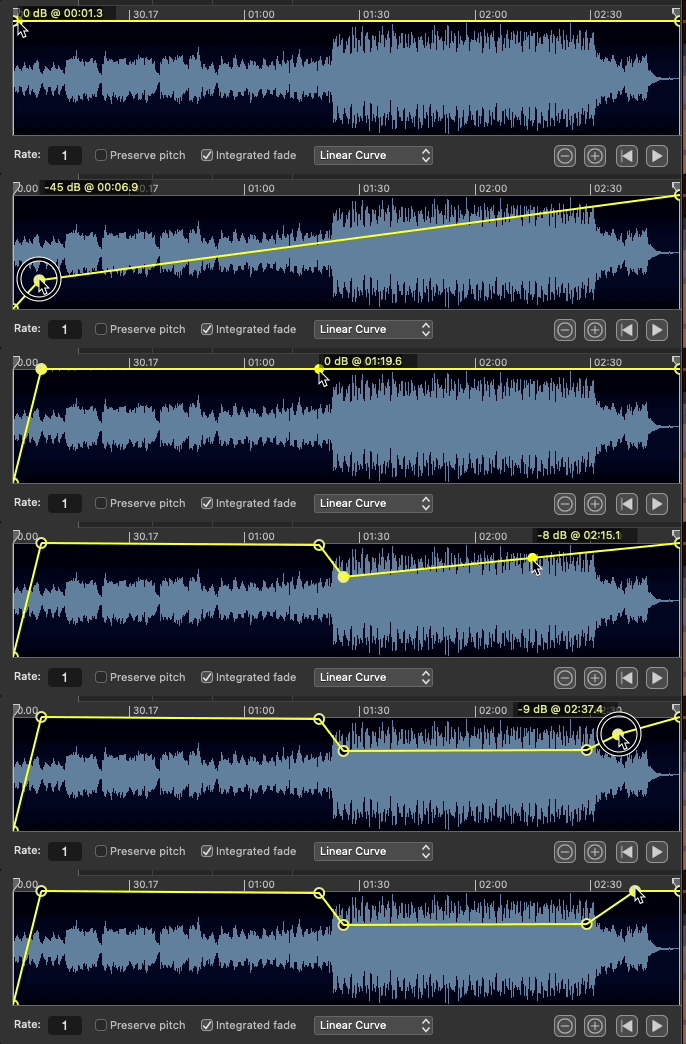
In this example, we’ll create a nice fade in at the beginning and then lower the volume for the loud portion near the end of this song. To do this I’ll simply click and drag on the yellow line.
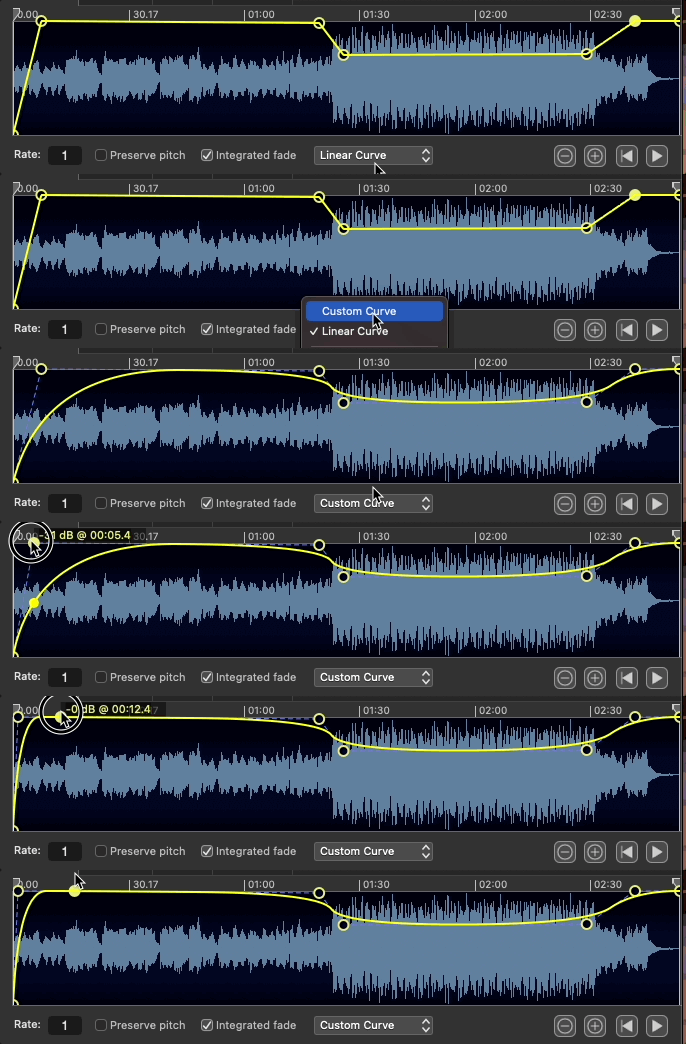
This has created a nice linear fade, but maybe you want something a bit more organic, smoother. Simply change the Linear Curve drop down to Custom Curve. I find that sometimes this is too smooth, so adding extra fade envelopes, extra fade points can help adjust the timing of Integrated Fade.
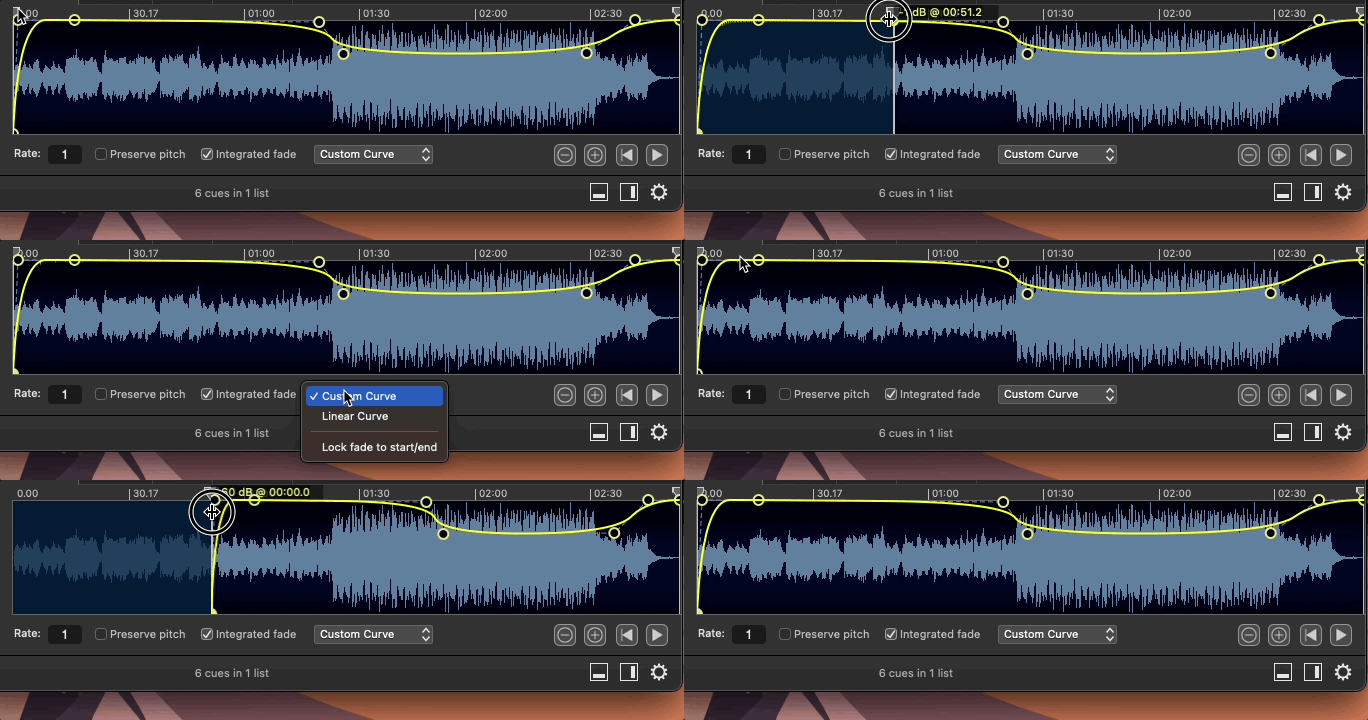
Finally, if you’re wanting to adjust the start time or end time of a sound, the integrated fades will stay with the timing of the source file, not the cue’s duration. However, if you want the integrated fade to be connected to the start time or end time, simply enable (or disable) the “Lock fade to start / end” feature.
Create a smooth fade for the song from the previous lessons. This time, instead of using a fade cue, use the integrated fade tool and fade envelopes.
What it displayed in the Time & Loops tab?
The audio cue’s wave form.