
When you add a media file to QLab, audio files, video files, images, etc; QLab doesn’t actually store those files inside the workspace file; instead, it simply references that file. This is really handy if you want to update the media. You can make changes to the content and overwrite the file. Because QLab’s connection to that media is simply a reference, the content update is now seen in QLab (as long as you stop and restart the cue).
The only problem with this is that when you move the workspace from computer to another (for example, a designer laptop to a production computer) you have to gather all the files from their different locations. While it’s always good organizational practice to make a folder in which you store all your work, it’s not always practical; especially when you’re working quickly time is a luxury. But that’s okay. QLab has a solution that will gather all your files for you.
In previous versions of QLab, this process wasIt’s called “Bundling”. You would export your workspace and all your files would be gathered alongside it. QLab now gives you “File Management” options, which can be found under Workspace Settings. If you haven’t used Workspace Settings yet, you can find it under the File menu or by clicking on the small gear icon in the lower right corner.
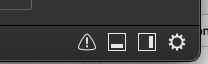
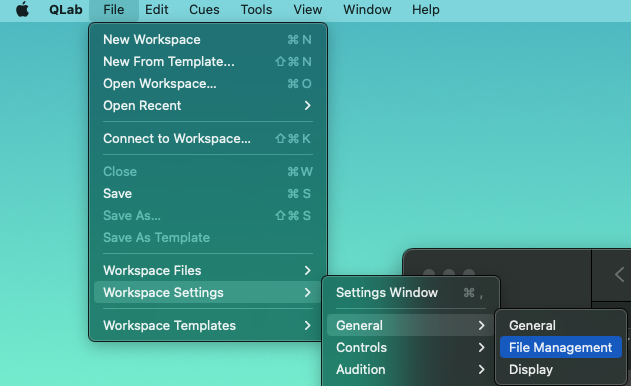
Here you can tell QLab to automatically copy files into a project folder. This folder will hold your workspace, all your copies files, and any backups that QLab creates. Fantastic! This is especially handy when you’re working too quickly to organize or when you’re pulling media from an external source such as a network drive or an external hard drive.
If this wasn’t enabled when you started building your workspace or if you didn’t want QLab to automatically organize your files for you (possibly because you wanted a different organizational schema for your files) – you can still gather all the media QLab needs by using the “Copy Media” command under the File menu.
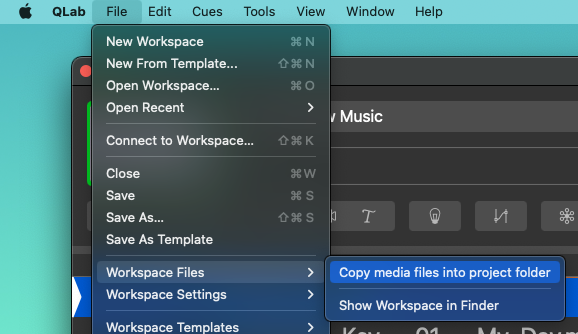
You can now find your media placed neatly into a folder alongside your workspace. If you created a project folder, your Finder will create a neat little purple QLab project folder icon. If not, you’ll see the standard blue folder. Either way, this folder can now be shared to another computer.
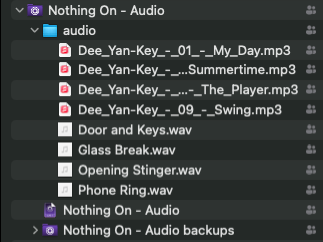
There are a lot of ways to share your workspace and corresponding media. If you have a USB drive, simply drag and drop. Using a sharing service such as WeTransfer is handy as well, drag and drop the whole folder into the webpage and tada! But sometimes it’s nice to compress the files into a ZIP file first. How? Just right click on the folder and select “Compress”.
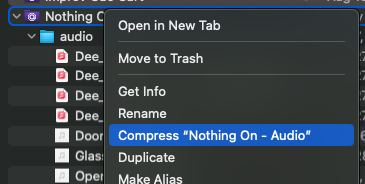
After a little chug-a-lug-a-lug you’ll now see a ZIP file alongside your original project folder.

Hurray! Now you’re a master at sharing files.
Download this bundled workspace. Open it. Bundle it. Then compress it for easy transfer.
Seems redundant, doesn’t it? But can you do it?
What is the purpose of Exporting?
It gathers everything used in your workspace and puts it all into a specified folder to be then transferred to its new location.