
It’s incredibly important to understand that QLab doesn’t create media, in the case of sound design, QLab takes existing audio files (music, sound effects, and so forth) and plays them back. At some point I assume you have, on your computer, an audio file to be played – likely a piece of music. You probably also have the resources to find music and sound effects or have the skills to create your audio from scratch. If you don’t, go ahead and Google Sound Effects Library or Royalty Free Music. Or even simpler, for the purposes of this less, try downloading this package of four different fanfares.
Once you have your audio file (be it your own piece of music or the downloaded fanfares) there are several ways to place the file into QLab to be played. Which method is right? Well, that really depends on your workflow and your own personal preferences.
The simple method is to drag the file into QLab and drop it into the cue list. Tada. That’s it.
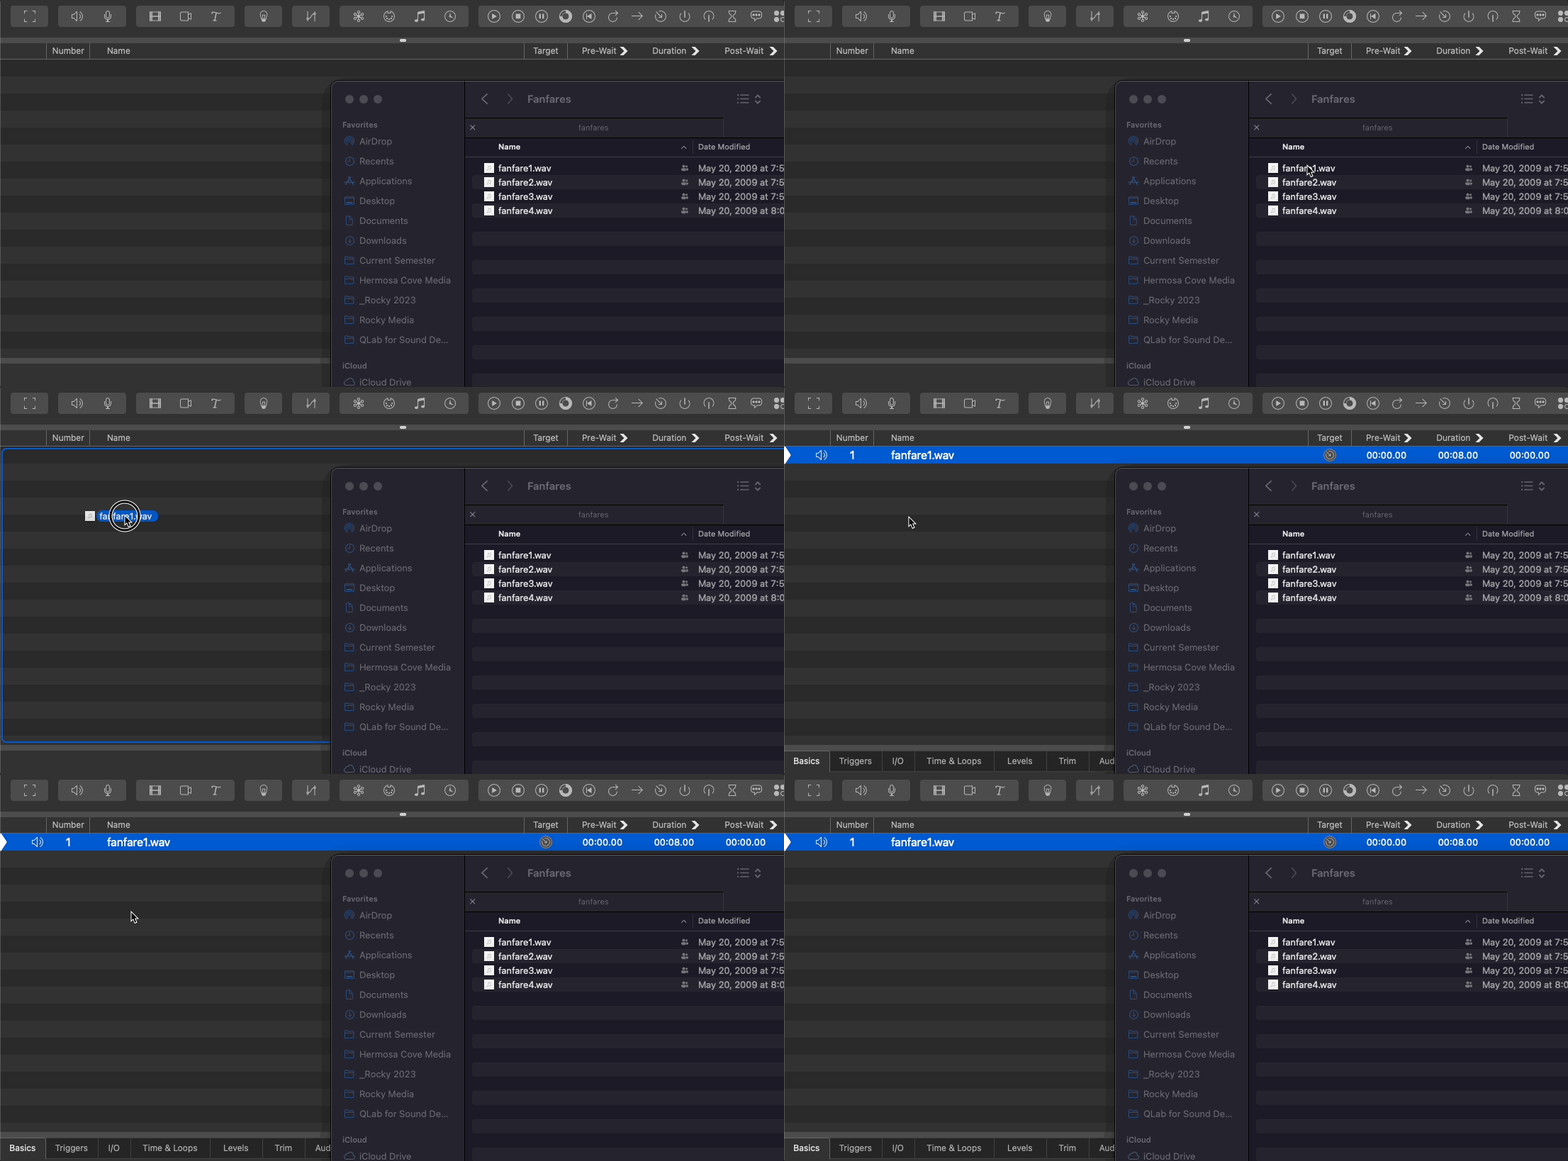
I can click on it, hit go, and … there’s my Fanfare. But there are actually a few steps happening here, so let’s break them down by showing you the other methods.
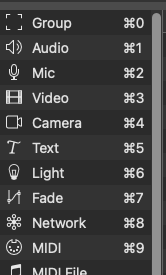
Method number two … A cue list can contain multiple cue types. Here in the toolbox you can see an icon that represents each one.

Or open the toolbox to see their names and shortcuts.
I can add any of these cues by dragging and dropping or by pressing the corresponding hot key. Here, for example, I’ll add two Audio Cues; one before Fanfare1 and one after.
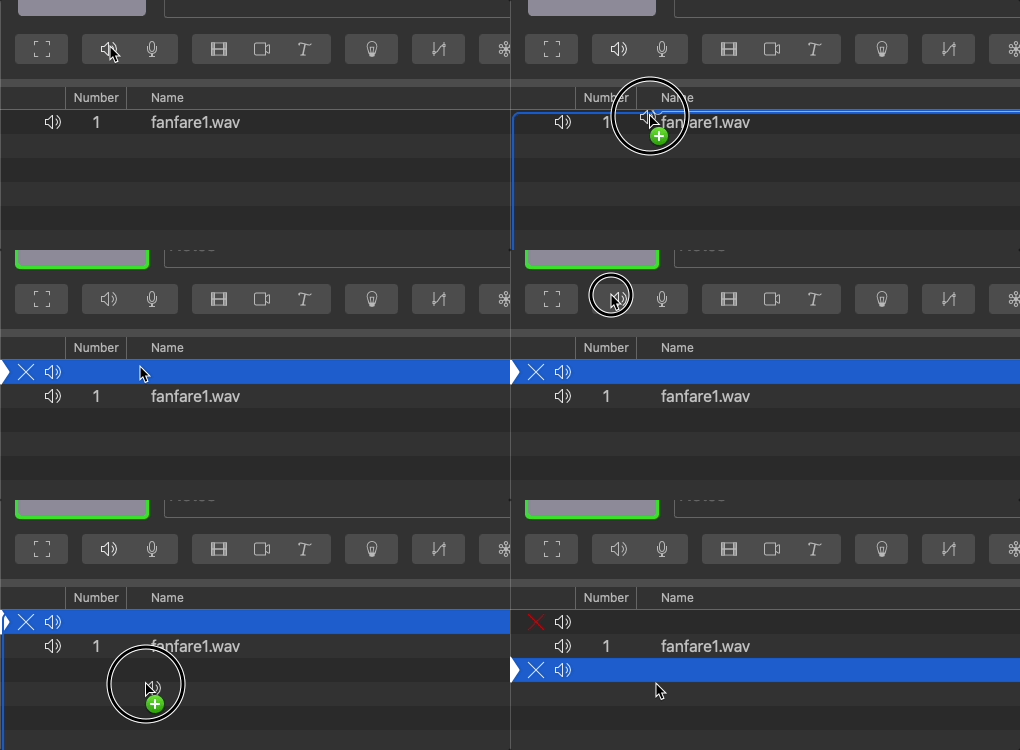
Here now we have a two new audio cues with red X’s, meaning they’re “broken”. This is because they have no audio file assigned, they don’t know what file to play. That file is referred to as the cue’s target. I can define the cues target by simply dropping the file onto the cue’s row (much like I did in the previous method) over the target icon. That area will turn blue, signifying that you can drop the file there.
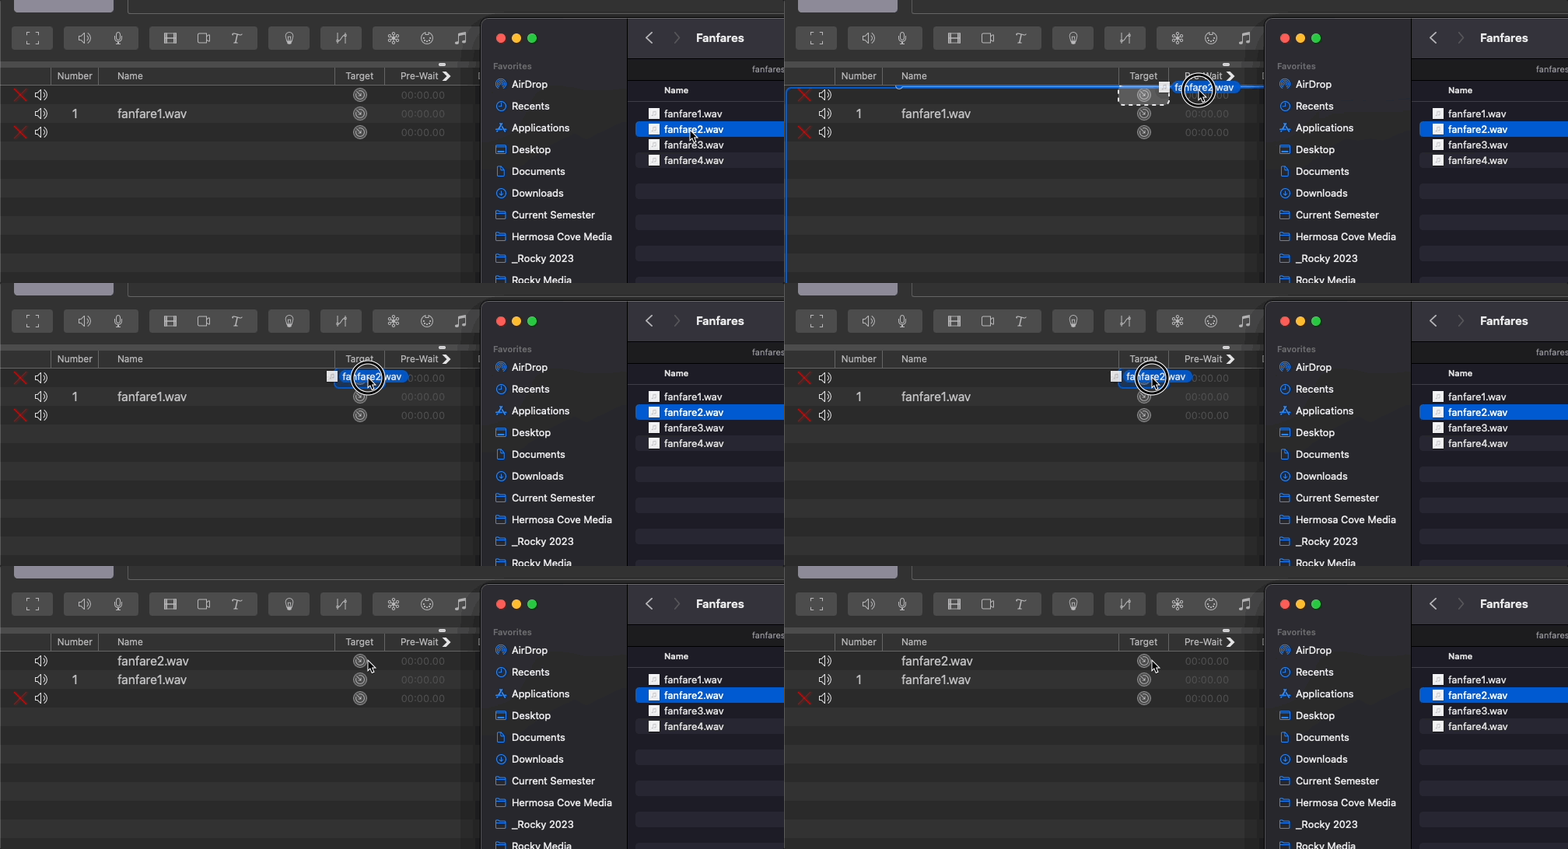
Drag. Drop. Select. Go. Simple and easy.
The next method is simply a variation on the previous one. Here in the cue list is a small button. If I click it I’m shown a Finder window. I can use this dialogue box to navigate to the location where my sound effects or music are kept and select the needed file. Press “Okay” and we’re off to the races.
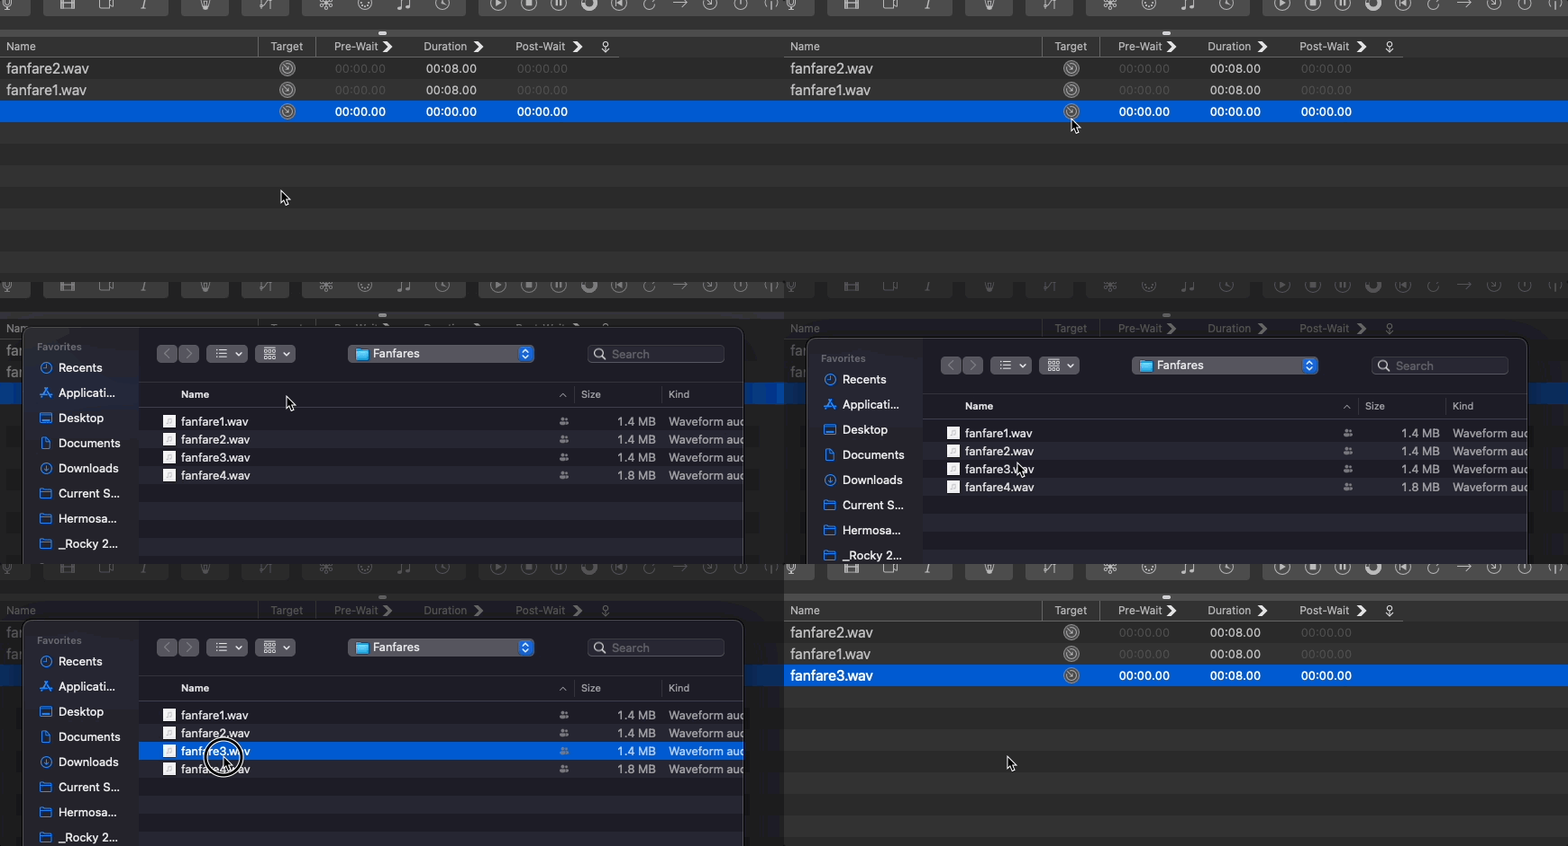
The final method is, once again, a variation. Once a cue is added, I can assign a target in the inspector tab by either dragging the file onto this box or by double clicking and selecting the file. What’s especially nice about this box is I can now identify the location of the file using the breadcrumbs. Where was that file stored again? Don’t worry, I’ve got this. In fact, click the magnifying glass icon and QLab will take you directly straight to that folder.

This chapter’s workspace contains was shown in this video. If you’ve downloaded the workspace, all the audio files are in the folder. Try creating a new workspace and adding the files using the different methods discussed.
What’s the simplest way to inset an audio file into QLab?
Drag and drop the file into QLab.