
This is going to be a simple lesson. One for you to come back to and say, “How do I do that again?”
Depending on your fixture, you could have a lot of parameters. A small fogger might only have two – amount of fog and fan speed. A simple LED light might only have three – red, green, blue. But a fancy moving light could have 20, 30, even 60 parameters. It would be silly to create a screen for each of these parameters; so instead, EOS creates a few flexible screens for you to interact with.
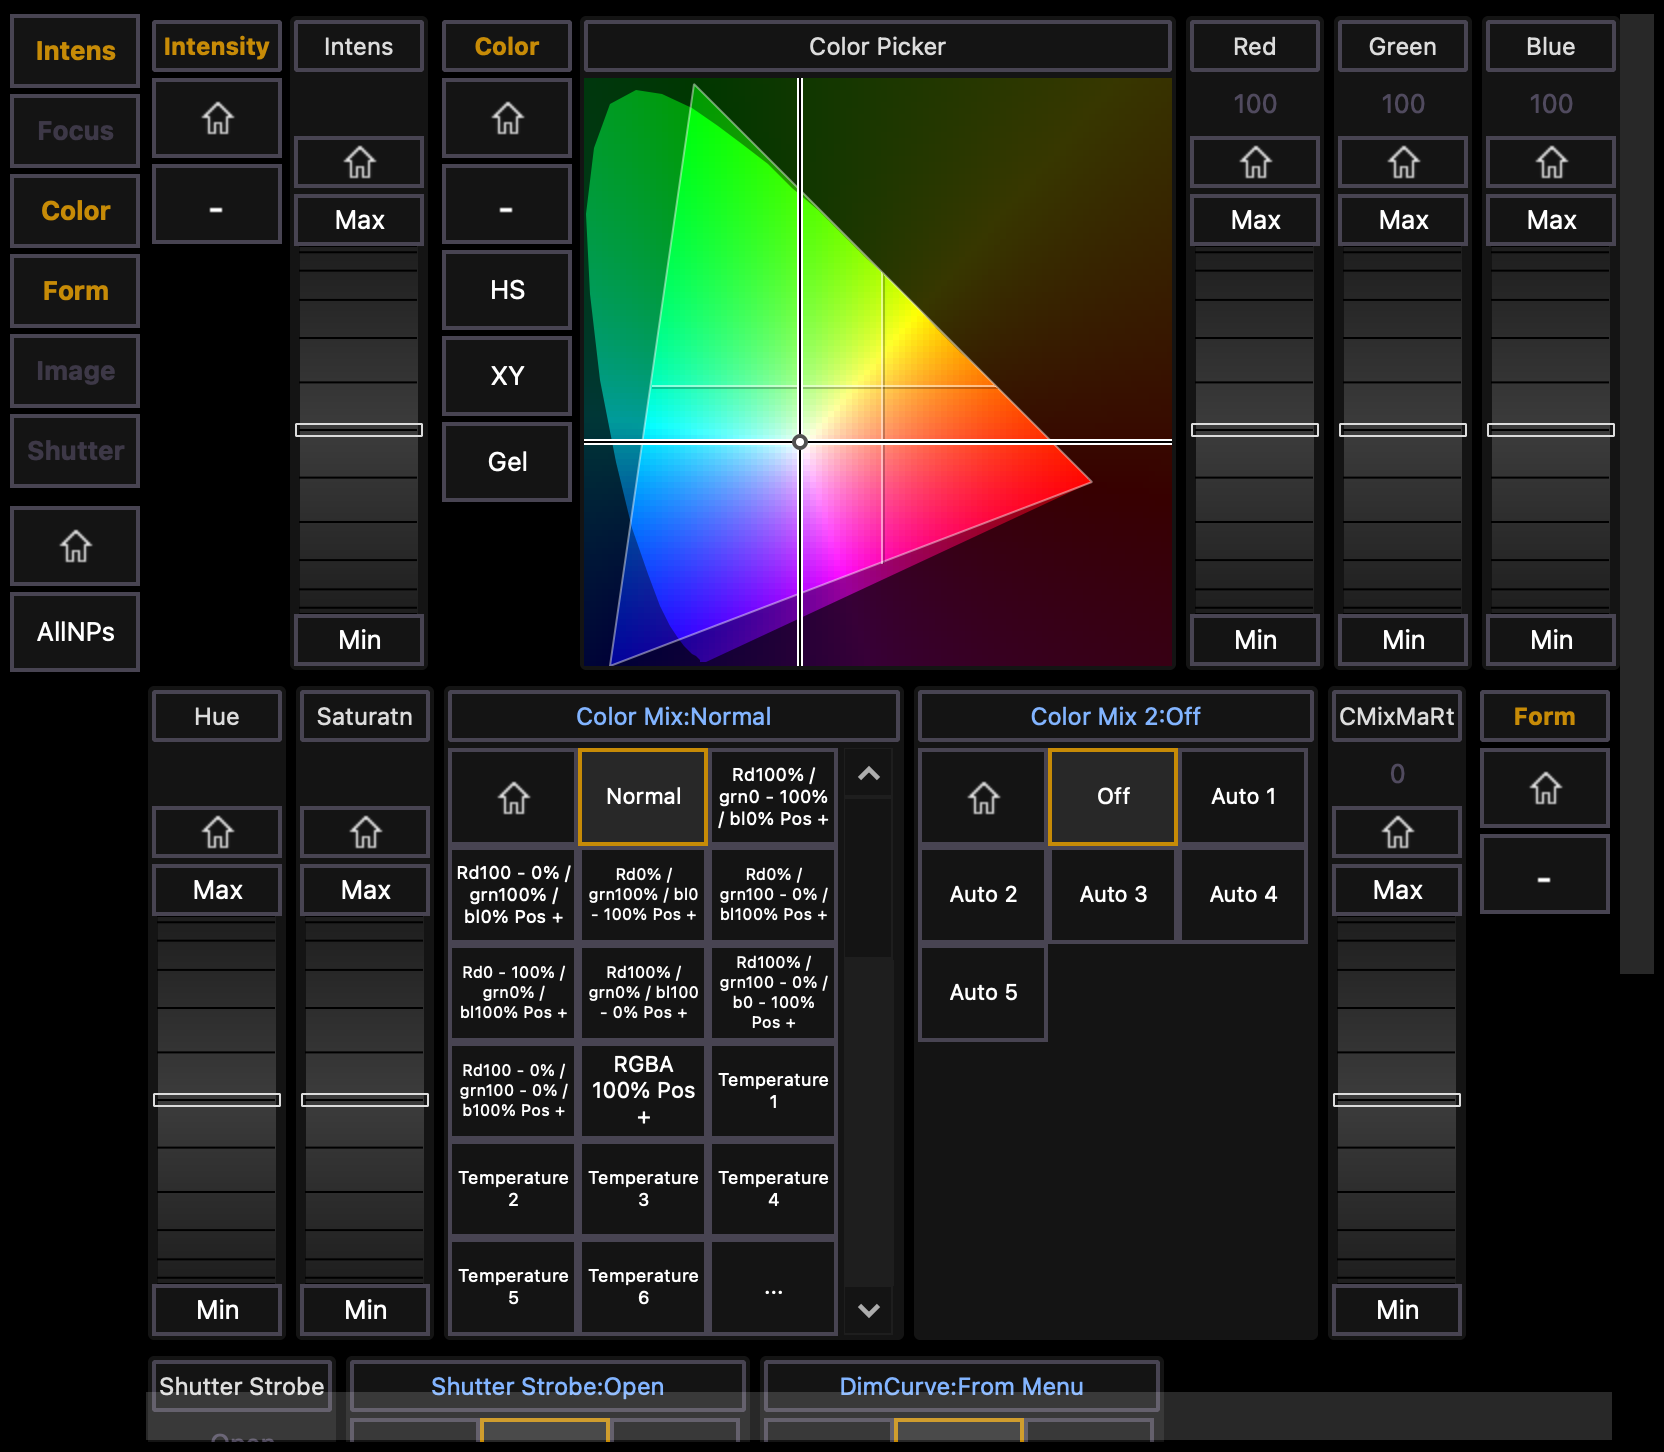
You’ve already dealt with the color picker, next I’d like to show you the Moving Lights display, or ML Controls as it’s called in the tabs.

If you don’t have any channels selected, this display will just be a big black box. But if you click on a channel in the Live Table or selected a channel in the command line (i.e. [4] [Enter]). You’ll see all the possible parameters; organized in a standard group of Moving Light categories – Intensity, Focus, Color, Form, Image, and Shutter. Clicking on the yellow category button on the left will scroll the window down to the controls for that category.
The first, and perhaps the most important button you’ll see is the one that looks like a little house – this is the [Home] button. These exist for every parameter, every category, and even the entire fixture. This will set the fixture’s parameters back to the home values and release control. This is similar to the sneak command.
Try it out by bringing channel 4 to full and choosing a cool color from the ML color picker.
Next press the [Home] button above the red parameter; which will leave the color values for the other color values – but return the red value to 100 (not 0).
Now try to press the [Home] button under the color category; this will release all the color values, returning them to 100 – which means all colors are present – white (this is why it returns to 100, not 0).
Finally, press the [Home] button at the way left, which will sneak all values – this time intensity is the only one remaining – now all parameters are released.
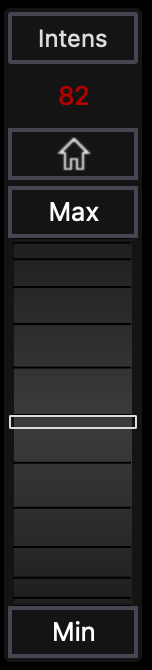
The next thing I’d like you to see are the wheels. This is virtual representation of a physical scrolling wheel that you might find on a large, physical light board. Make sense? It helps if you’ve seen one in real life.
Anyway, it’s a wheel.
Here you can either click, click and hold, or drag the wheel. Depending on how far above or below you are from the center line, the values will increase or decrease in small or large increments. But personally, I like to use my mouse wheel (or trackpad scrolling) to scroll the wheel up or down. Simply hover your cursor over the wheel and scroll away! Try it out by selecting channel 4 and scrolling up the intensity.
Wheels also have a [Min] button, which will bring the parameter to its minimum value and a [Max] button, which will bring the parameter to its maximum value. Try it out with channel 4’s intensity. Min will bring it to 0%. Max will bring it to Full.
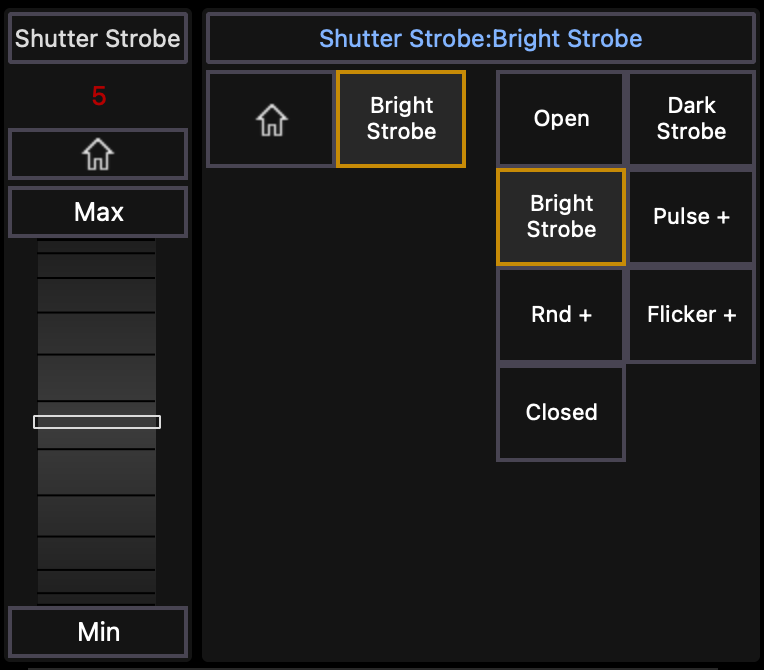
Another way a fixture might interact with EOS is by using option buttons. This is a way for the light board to display various options that are unique to the fixture itself. Select channel 4, set it to full, and press the [Form] button which will scroll you to the bottom of the window.
Pressing the “Bright Strobe” button and turning the Shutter Strobe wheel to a value of 5 and the fixture should start flashing. You could then scroll the strobe wheel to create a different frequency (a faster or slower strobe).
Pressing the “Open” button will then restore the strobe to its always on state (reminder, you could also press the [Home] button). By the way, a “Closed” strobe is an “always off” state – so if your lights just won’t turn on, that could be why.
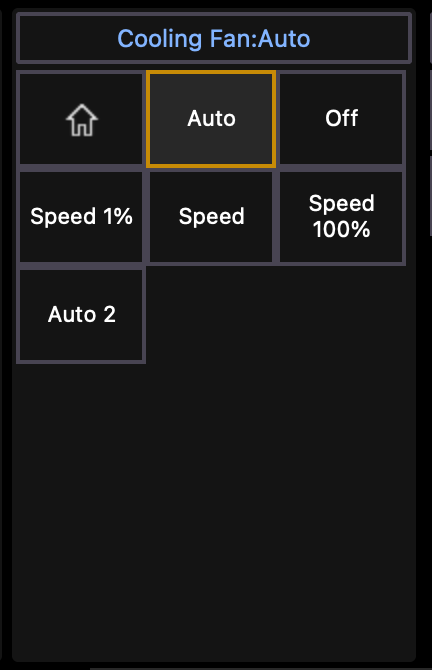
Other buttons that are truly unique the fixture will likely have no visual representation in Augment3d – meaning you can’t see what the real life fixture will do in the real world. For example, channel 4 has a “Cooling Fan” option. If you were to select “Off”, the light stays the same color and brightness – but off in the distance of some virtual world, the fixture’s cooling fan suddenly turned off and the virtual fixture is overheating. These can be largely ignored in visualization and should be used only in real life.
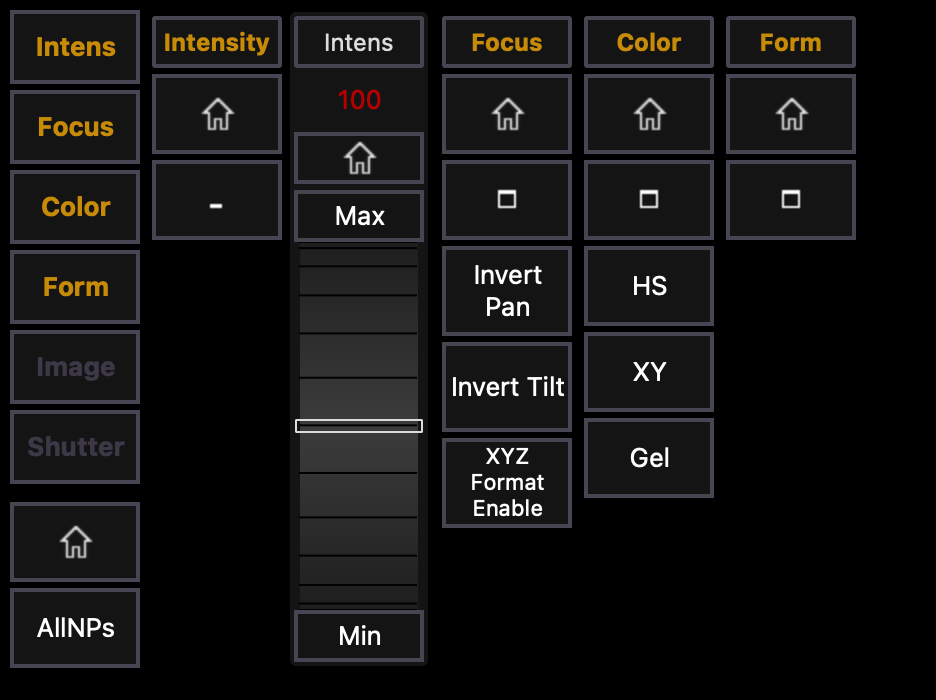
Another quick tip / trick to help visualize your ML Controls … sometimes you don’t care to see a certain feature set / category of a moving light. Clicking in the [-] button under any category will minimize its controls. Click the button again (which now looks like a box) to maximize the controls. Here, for example, I’ve minimized all the categories except for Intensity.
We’ll talk about the other options you might find in the ML Controls in the next few lessons; but for now, here’s one last little tidbit …
Unless you’re doing a lot of work with specific features of an intelligent fixture, you might not want to use all that screen space to always show the ML Controls display. In this case you could use the ML Controls popup. This can be found in the top, right corner of the screen by clicking on the little icon that looks like beams of light; found next to the Virtual Keyboard popup button and the Magic Sheet popup button.
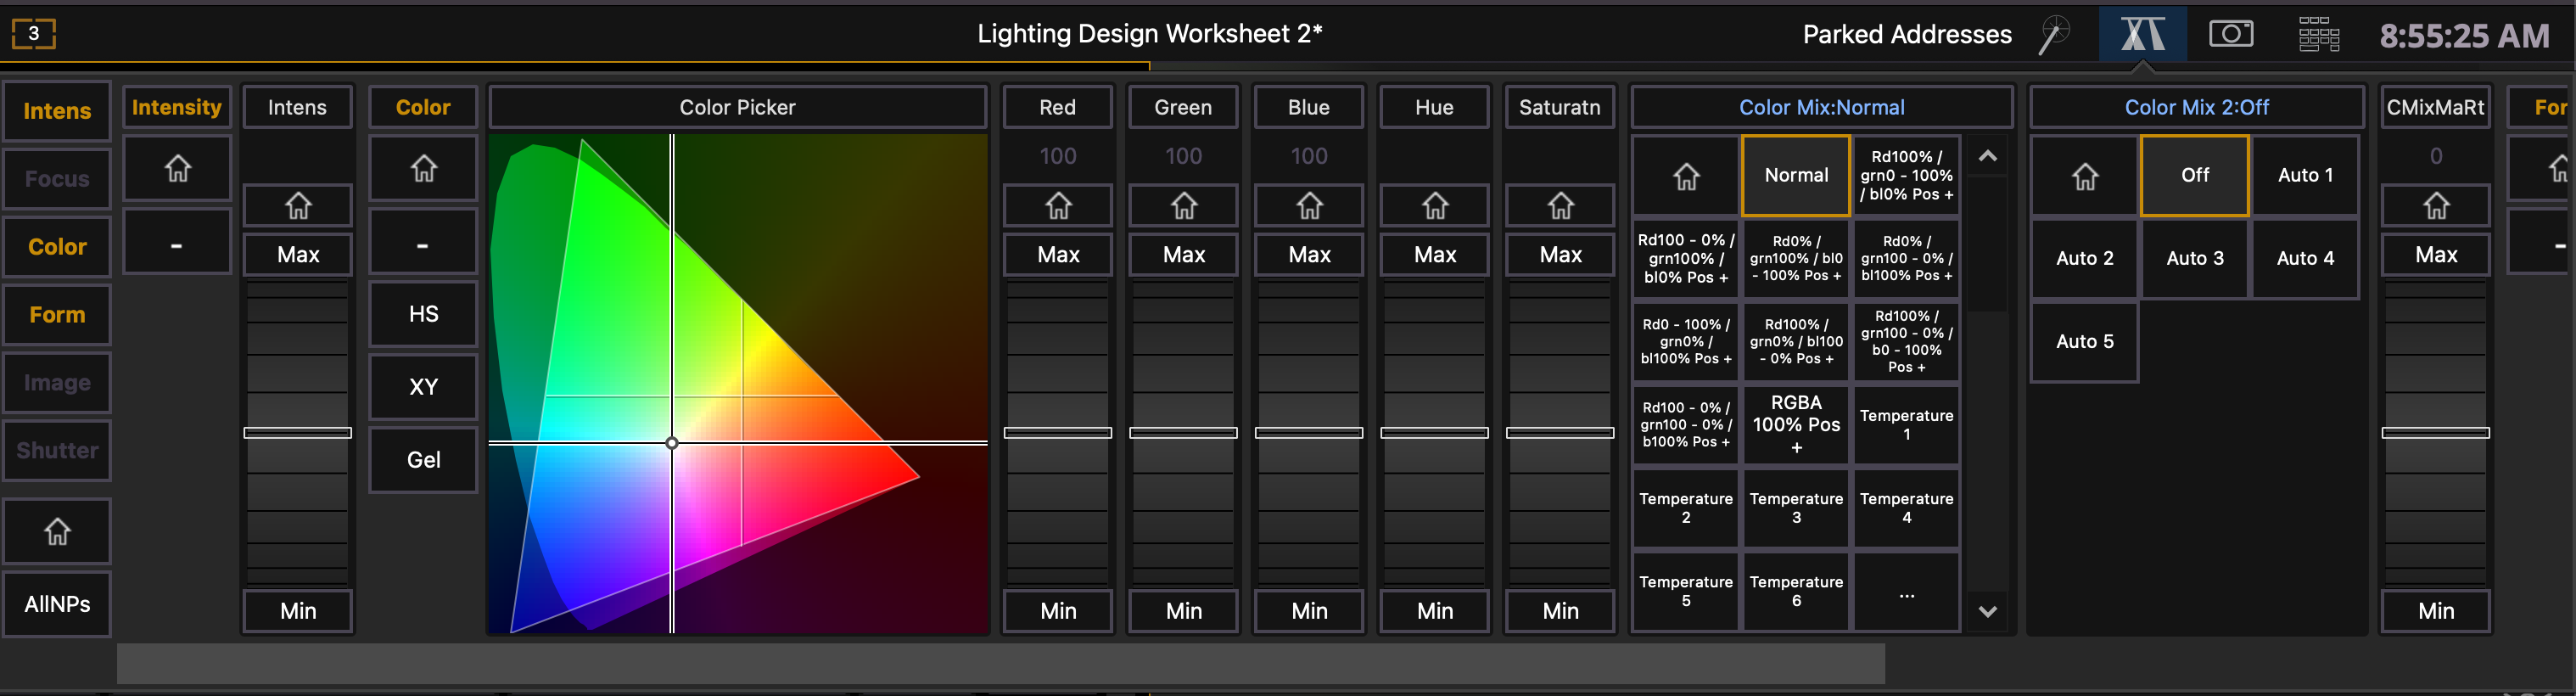
“OH MY GOSH, I’M FRUSTRATED” you might say. “When I select a channel, none of my FOCUS parameters are available in the ML Controls window. And the category is completely grayed out! Why is that? WHY IS THAT!!!”
Well, first of all, I don’t think you have to get so angry about it. This display of anxiety won’t change anything.
The answer to your problem is most likely that your fixture doesn’t move. ML Control categories and parameters only show up if the fixture has those features. A light doesn’t have moving options if it’s not a moving light. A light doesn’t have color options if it doesn’t have variable colors. A light doesn’t have fogger options if it’s not a fogger. Take a breath, all will be fine.