Setting up Hardware
Before you can begin recording in your software, you first need to setup your hardware – which is by far the most difficult piece of recording. Knowing the necessary quality and nature of your audio will determine the type of recording equipment you’ll need. Examples might be …
- On Board Microphone – Your laptop or phone’s microphone could be good enough to record a sound effect that will be played off in the distance, one in which a lower quality recording won’t be obvious. If you find a quiet space, this microphone could even be good enough for a narration or voice over, since the human voice doesn’t have a wide frequency range (like a piano does).
- Bluetooth AirPods – Don’t. Just don’t. Unless you’re simply recording something that will be replaced later, don’t. I love my AirPods, they’re just not for recording.
- Wired Lapel / Microphone – These microphones are great for the spoken word. I’ve regularly wired up a lapel microphone and an iPhone to record narration in a video and just stuffed the phone into the actor’s pocket. It works! And is way better than the on-board video camera microphone.
- USB Audio Interface / Microphone – Something like the Focusrite Scarlett 2i2 is a fantastic tool for capturing detailed foley work. You can choose the type of microphone you want for a given circumstance (dynamic vs condenser) and even utilize a primary and secondary microphone in case of high dynamics. I’ve used multiple microphones to create stereo spaces and even recorded a singer and her guitar using this device.
- Digital Audio Cards – There are even virtual audio cards, a way to capture multitrack audio over the network. Using tools like Audinate’s Dante Virtual Sound Card I’ve recorded 32 piece bands, live, in a multitrack recording allowing me to add effects and mix the individual instruments after the fact.
… what’s the correct device to use? I think the answer is “yes” – it’s a constant balance of quality and availability.
No matter your choice, setting up hardware in Audition (and any audio software for that matter) is pretty much the same … yes, even with your AirPods.
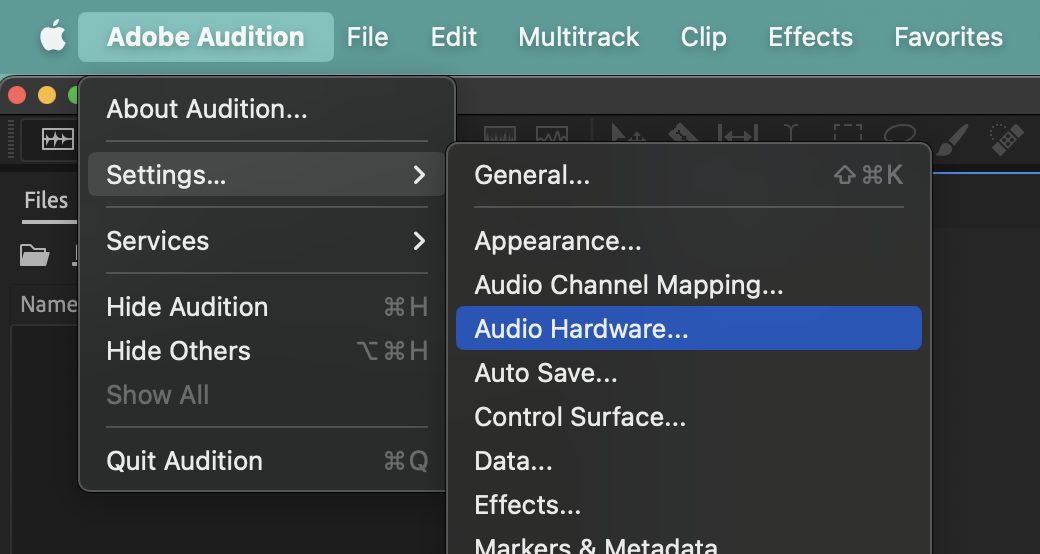
- With any audio software, you’ll need to find the audio hardware or audio device settings in the software’s preferences. In Audition that can be found … Adobe Audition > Settings > Audio Hardware
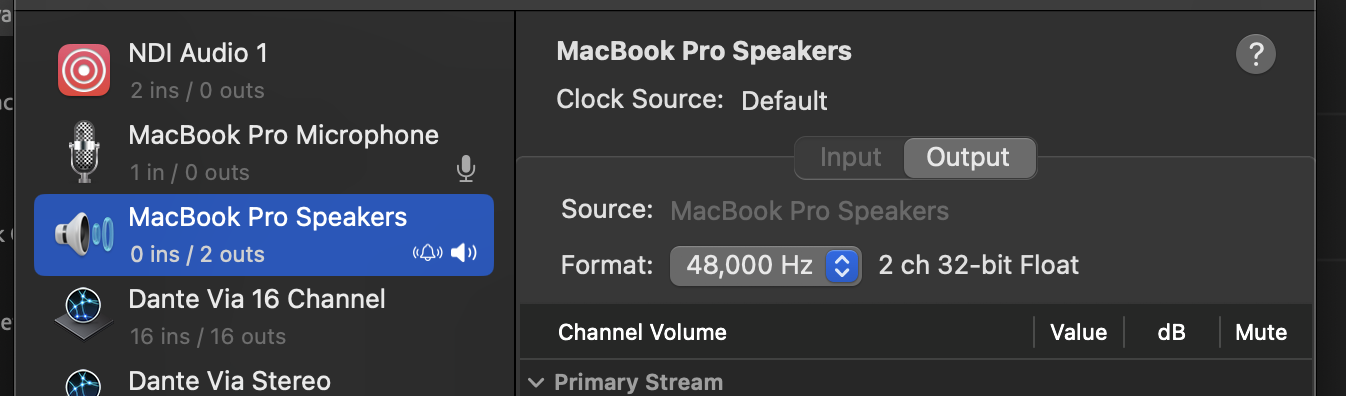
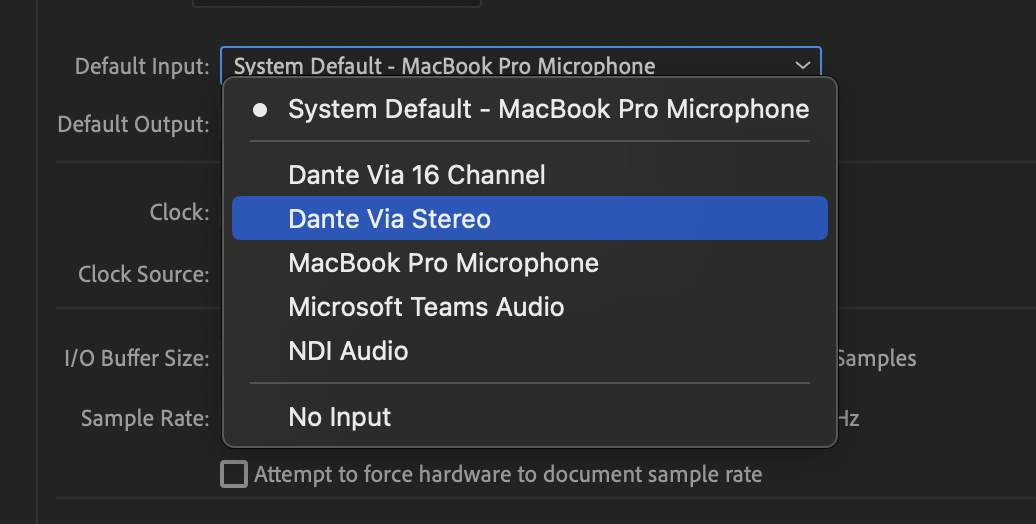
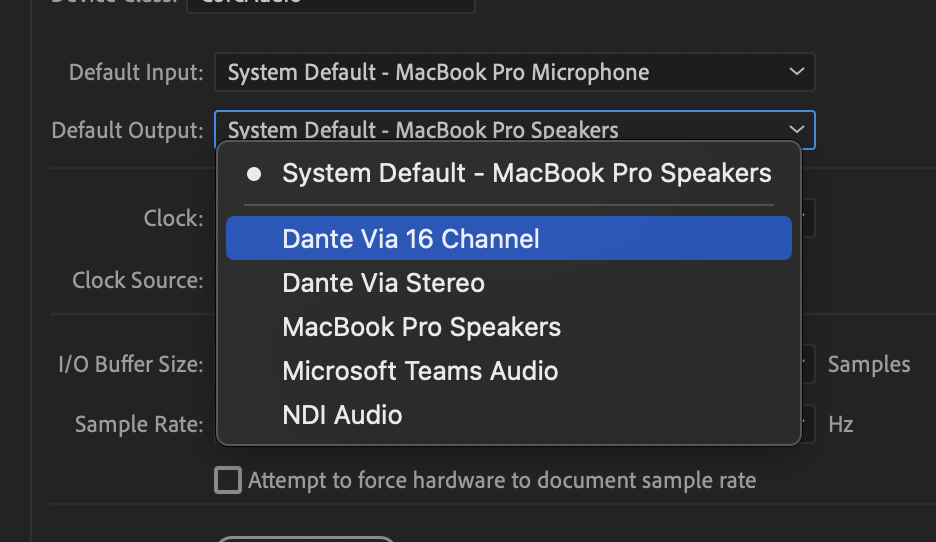
- Default Input – This is where you can select the device that is being used to record audio. Here you can see that I have several devices available to me; my MacBook Microphone, my Dante Via virtual sound card, I can even record audio from a Microsoft Teams online meeting. You should select whichever one you have available to you, which is likely your computer’s onboard microphone.
- Default Output – This is where you can select the device that is being used to play audio, your speakers. By default, Audition will select your System Default, meaning Audition will match whatever speakers you’ve selected on your computer. But again, you can choose a different output device; meaning you could listen to Spotify over your computer speakers but send Audition’s output to your theatre’s main speakers.
Also note that your Input / Output devices don’t have to be the same. Although this can occasionally cause issues. Just FYI.
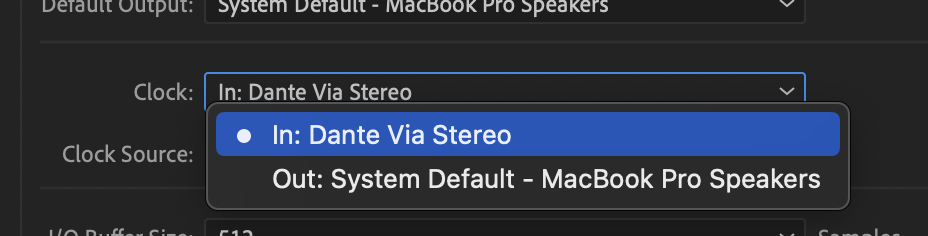
- Clock / Clock Source – This decides who is in charge of keeping time, who is the conductor? A simple rule to live by is to select the more expensive device or select the one that matches your current task (recording / playback — in / out). Sometimes if Audition just won’t record (you press the record button and nothing happens), changing the Clock might fix the problem.
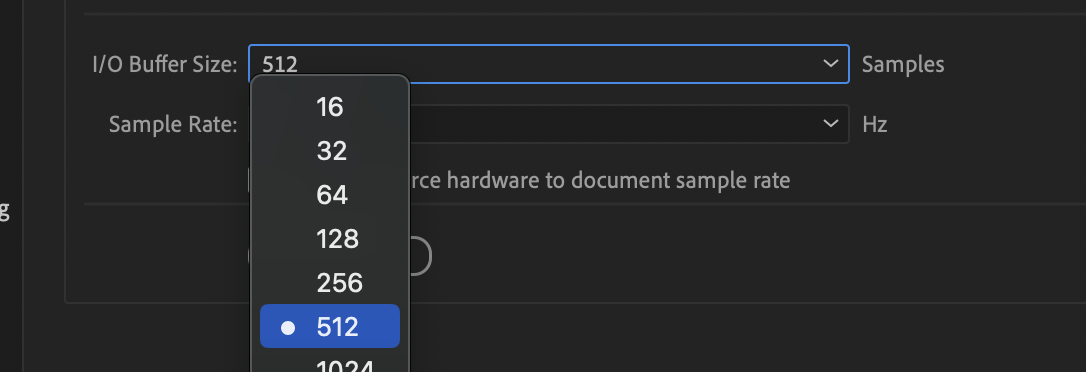
- I/O Buffer Size – YouTube video buffering might be the most common experience of “buffering”, looking ahead in the video and downloading it early just in case you have some WiFi hiccups. Similarly, this is a measure of latency; how many samples (or fractions of a second) should Audition be behind, just in case there’s a hardware hiccup. A higher number is best if your computer is having a hard time keeping up when recording (you’ll hear / see pops and clicks if this is the case). A lower number is best if you’re recording a vocal track alongside an instrument.
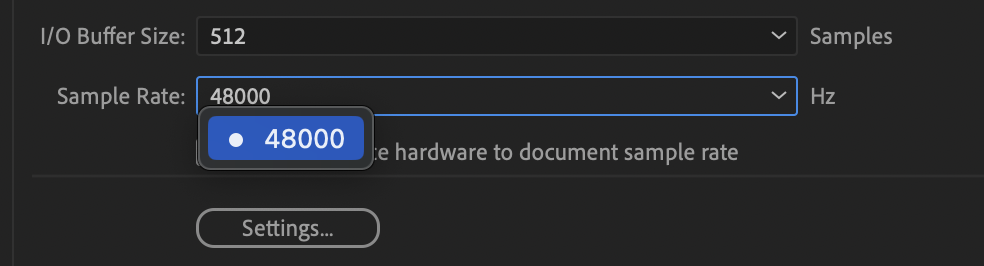
512 is standard.
- Sample Rate – How many samples are being taken per-second. Whether or not you fully understand Samples, it’s helpful to keep this number in line with your hardware and with your audio file settings. In audition you can click Settings to figure out what your audio hardware can do. Then match your Sample Rate accordingly. Often times the hardware will only allow you to select a what it can do.