

Effects
While we’ve worked hard to avoid seeing the movement of lights; there are times when we do want to let the audience remember that we’re in a theatre and let the style of the lights be “loud”. This of course should be done tastefully and artistically. Theatrical examples could be a series of moving lights quickly snapping to a single location to drive focus, or perhaps a flashing of green lights as a character becomes evil. Natural examples could be a flickering fire or the pulsing of emergency vehicle lights from outside an apartment.
Many of these instances could be very difficult to create using a standard cue structure; but don’t worry, Effects are here to save the day!
An Effect is a setting that can be applied to a channel that will alter a parameter in a pattern. Specific examples …
- An Intensity Ramp will alter the intensity of a channel to go up, then down, up, down, up, down
- A Color Chase will change the hue and saturation of a channel to travel around the color picker triangle
- A Figure 8 will adjust the pan and tilt of a moving light to create the pattern of a … yup … figure 8
In an ETC console these adjustments happen relatively and to scale – meaning they are based off the current cue. Specific examples …
- Channel 9 is currently set to 50% brightness
An Intensity Ramp with a scale of 25 will fade from 25% to 75%, then start over at 25% - Channel 51 is currently set to a deep blue
A Color Chase will fade through a series of blues, lavenders, and pinks; surrounding the original blue color - Channel 601 is focus DSR, Channel 602 is focused USL
Both are set to Figure 8 effects, but they never overlap because they’re focused in different areas of the stage; until we increase the scale to 200 and the meet center stage
If you’re a words person; hopefully that made sense.
If you’re a doing person; we’ll play around in a second.
In this lesson we’re going to discuss only how to use and adjust effects and how to record their usage into cues. If you’re interested in learning how to create effects from scratch or how to implement them into faders for concerts and other live performances; I would encourage you to check out this tutorial from the ETC website.
Alright. Let’s play.
The Effect button is found above the Record button; and double tapping it [Effect] [Effect] will show you the entire list of available effects. Or, for the sake of this lesson, I’ve printed the standard list of effects found in any new EOS file on our Dance Concert Magic Sheet – found at the far right.

Let’s start simple with Effect 901 – “Circle”. In your lesson file, bring up channel 601 at full and set it to Focus Palette 1. This should show the light DSR. Applying an effect works similarly to applying a palette – specify a channel and give it an effect. So here we’ll type [601] [Effect] [901] [Enter]. You’ll see the light begin to make a circle around the DSR focus area.
To help illustrate the relative nature of effects, let’s also set …
- 602 @ Full, Focus Palette 5, Effect 901
- 603 @ Full, Focus Palette 9, Effect 901
You should see all three lights making large circle motions around different center points.

To stop this effect, we simply need to give these lights a “null” or “nothing” value for their effect. So type [Group] [601] [Effect] [Enter].
This will stop any effects running on any light in this group.
As you were watching these effects run; it might have been difficult to tell which light was which since the circle motions were so large. This is where Scale and Size come into effect.
To alter the way an Effect is running; clear your command line and press [Effect]. You’ll see a list of currently running Effects, their names, and the channels that are currently utilizing these effects.

Currently we only have one effect running, 901, applied to channels 601 through 603. At the far end of the list we see the Size column. We can adjust the Scale or Size of this effect by clicking in the cell where these two meet.
So go ahead and click in the Size column. You’ll then be prompted to provide a new value. Enter in the number 300.

Now your circle motions will be much larger; encompassing the entire space. Let’s try the other direction. Click on the cell again and enter a number less than 100, such as 15.

Now your circle motions will be much smaller. You’ll also notice that the large motion took longer to make a full circle and that the smaller motion goes much faster. To change that pace we can alter the rate. So click on the cell under the Rate column. To make our motion go slower, enter a number smaller than 100 – such as 10. Now our movement is nice and patient.

If we liked this movement; we could now record this Effect, including our Rate and Size adjustments, into a cue. So go ahead and record this as cue 9.
Updating an effect works just like any other adjustment. Press [Effect] again and adjust the Rate to 50 and Size to 200. This will make a large, slow movement around the stage. Go ahead and press [Update] [Enter].
When transitioning into or out of an Effect; the Size and Rate will also fade. To help illustrate this let’s stop the effect. This time use the Stop Effect button at the far left side of the keyboard; [Stop Effect] [Enter] (or Shift + Alt + E if you can’t find the button). This will make any Effect that is currently running, stop; not just the channels that you specify.
Go ahead and record this as Cue 10, then record this again as Cue 8. This will make two identical looks, without the effect, to bookend Cue 9. If you transition from 8 to 9 and 9 to 10; you’ll see the Effect itself fade, which will make a kind of spiral motion – and honestly, it’s really lovely that we don’t just snap straight into an effect. But of course; that might not be what we actually wanted. Every choice has a time and a place. These settings can all be adjusted using the options at the bottom of the screen.

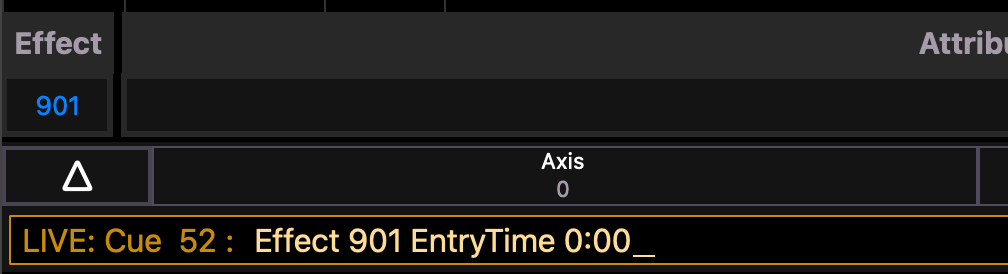
For example, changing the Entry to an “Entry Time” of 0 will cause the lights to begin moving immediately.
Alright; let’s illustrate another important concept in Effects – Grouping Order.
Go to Cue 0, a blackout, and bring group 601 to full. You should have a lovely line of lights, like this.

These lights are ordered from left to right, 601 to 606.
Let’s use an Effect that is a bit simpler to observe, like an Intensity Ramp. So type [Group] [601] [Effect] [915] [Enter]. This will create a “chase” of lights from left to right. But if we were to enter our lights in a different order, the order of the chase would also shift.
So clear the Effect by typing [Group] [601] [Effect] [Enter].

Now, swap up the order. Maybe we’ll do 601, 604, 602, 605, 603, and 606. To do this type [601] [+] [604] [+] [602] [+] [605] [+] [603] [+] [606] [Effect] [915] [Enter]. Yup. That’s how you do it. Now the order of the chase will match the order of the channels you specified.

Alright; let’s go to a blackout again.
This time; let’s use Group 60 to showcase a color effect. So take Group 60 at full, which should create a full stage of down lights. And set this group to Effect 917 – [Group] [60] [Effect] [917] [Enter].
This will create a nice rainbow chase between all the lights. If you’re watching closely (or use Effect 915 again); you’ll notice that the chase doesn’t happen in order; because Group 60 is actually listed as 51-59 + 61-69 + 721-723 – or the left lights, then the right lights, then the center lights. But the actual, physical location looks more like this …
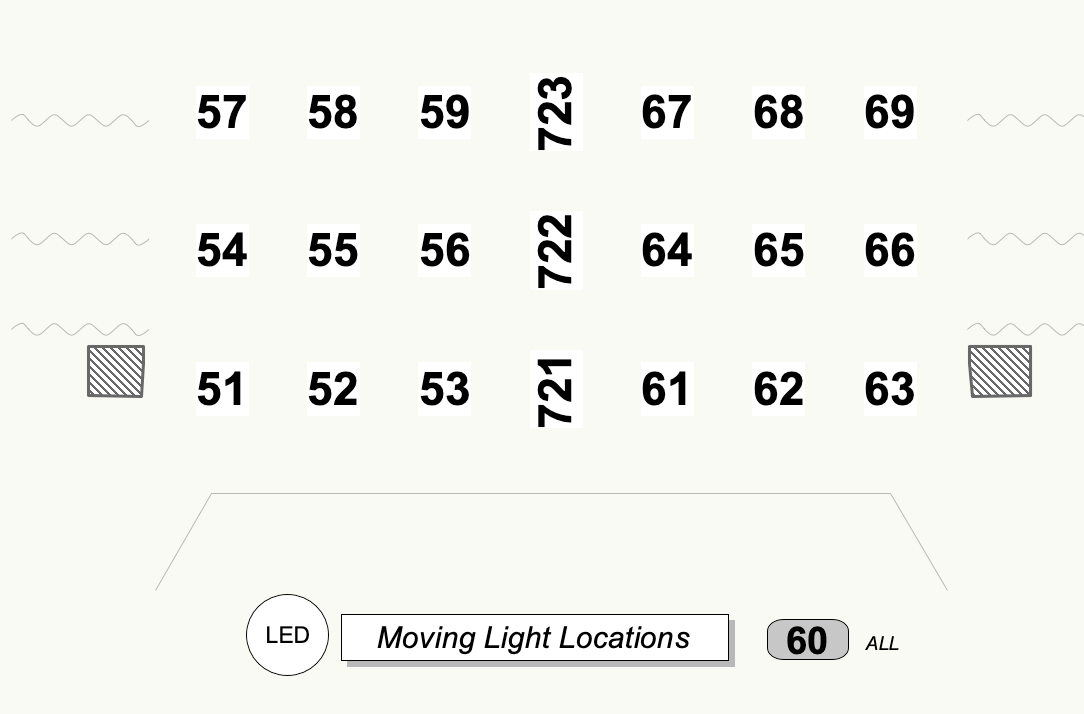
So to fix this problem, we could re-record Group 60 using a stage order (left to right, downstage to upstage) rather than numerical order. That would look like this …

Finally, one more great thing about effects – we can stack multiple effects on top of one another. So here would be an example of combining Effect 912, 915, and 903 into our updated Group 60.

Combining multiple effects, changing color, and altering focus locations can create a whole multitude of looks. Really; you’re bound only by your artistic imagination! And time … playing around can be fun, but remember Voltaire’s adage, “perfect is the enemy of good.”