

Using Channels
Channels are simply a numerical representation of a light. Typically we’ll give lights numbers that make sense to a designer. For example we’ll regularly group lights of a similar purpose sequential numbers (i.e. All the front lights are 1-9. All the blue gobo lights are 81-88). Because they’re quick numbers rather than names, they take up less space on our screen and are easier to talk about with other members of the design team.
Each Channel can then have multiple properties – intensity, focus, color, etc. We’ll talk about some of the fancier ones in a later lesson, but for now, let’s just concentrate on the most common property … Intensity.
Here in our Live Table Display we see represented 9 lights or 9 channels. Any channel with a blank value is most likely off, an intensity of zero. Any channel with a value is being told what to do and is represented with a percentage, so a value from 0-100 or 0-Full.
So in the example below …
- Channel 1 – Is currently at 100%, Full, the brightest the light can be.
- Channel 2 – Is currently at 10%, a tenth of how bright the light can go.
- Channel 3 – Is currently at 0%, go out, do nothing.
This light was probably on before this moment, but was since taken out. - Channel 4 – Is currently not being told to do anything, so it off.
- Channel 5 – Is currently at 65%, a decent brightness with a little room to grow.
- Channels 6-9 – Are also currently off.

In order to tell a channel what to do, in order to give it a command or direction, start by clicking on the channel you want. It will now have a yellow outline – such as Channel 5 in the example above. If you click multiple lights, they’ll all be selected together. Clicking an already selected light will deselect it. So, using the example above, if I were to click on Channels 4, 5, and 6 – I would now see the following.

Go ahead, try it with me. Click on Channels 4 and 6.
If you look toward the bottom of the screen, you’ll see the Command Line change. Old light boards didn’t have clickable screens and everything needed to be typed in manually using computer code. The Command Line is a remnant of that age, but still proves to be an incredibly fast way to give clear and accurate instructions to your light board.
So now, at the bottom of your screen, you should see the following Command Line.

This command is currently stating that Channels 4 and 6 are waiting for instructions; what do you want to do to these two lights? So next press the [@] button, or the letter A on your keyboard. You should now see this in the command prompt.

Next, you’ll need to provide an intensity. Let’s put these lights at 80%, almost as bright as they can go, so type the numbers [8] then [0]. Now you’ll see the entire command.

If you’re happy with the instruction (which we are) go ahead and press [Enter] to send the command to the light board and put it into action. If you messed something up (a.k.a. if your command line doesn’t look like mine), you can always press Clear on the Virtual Keyboard or Delete / Backspace on your computer keyboard.
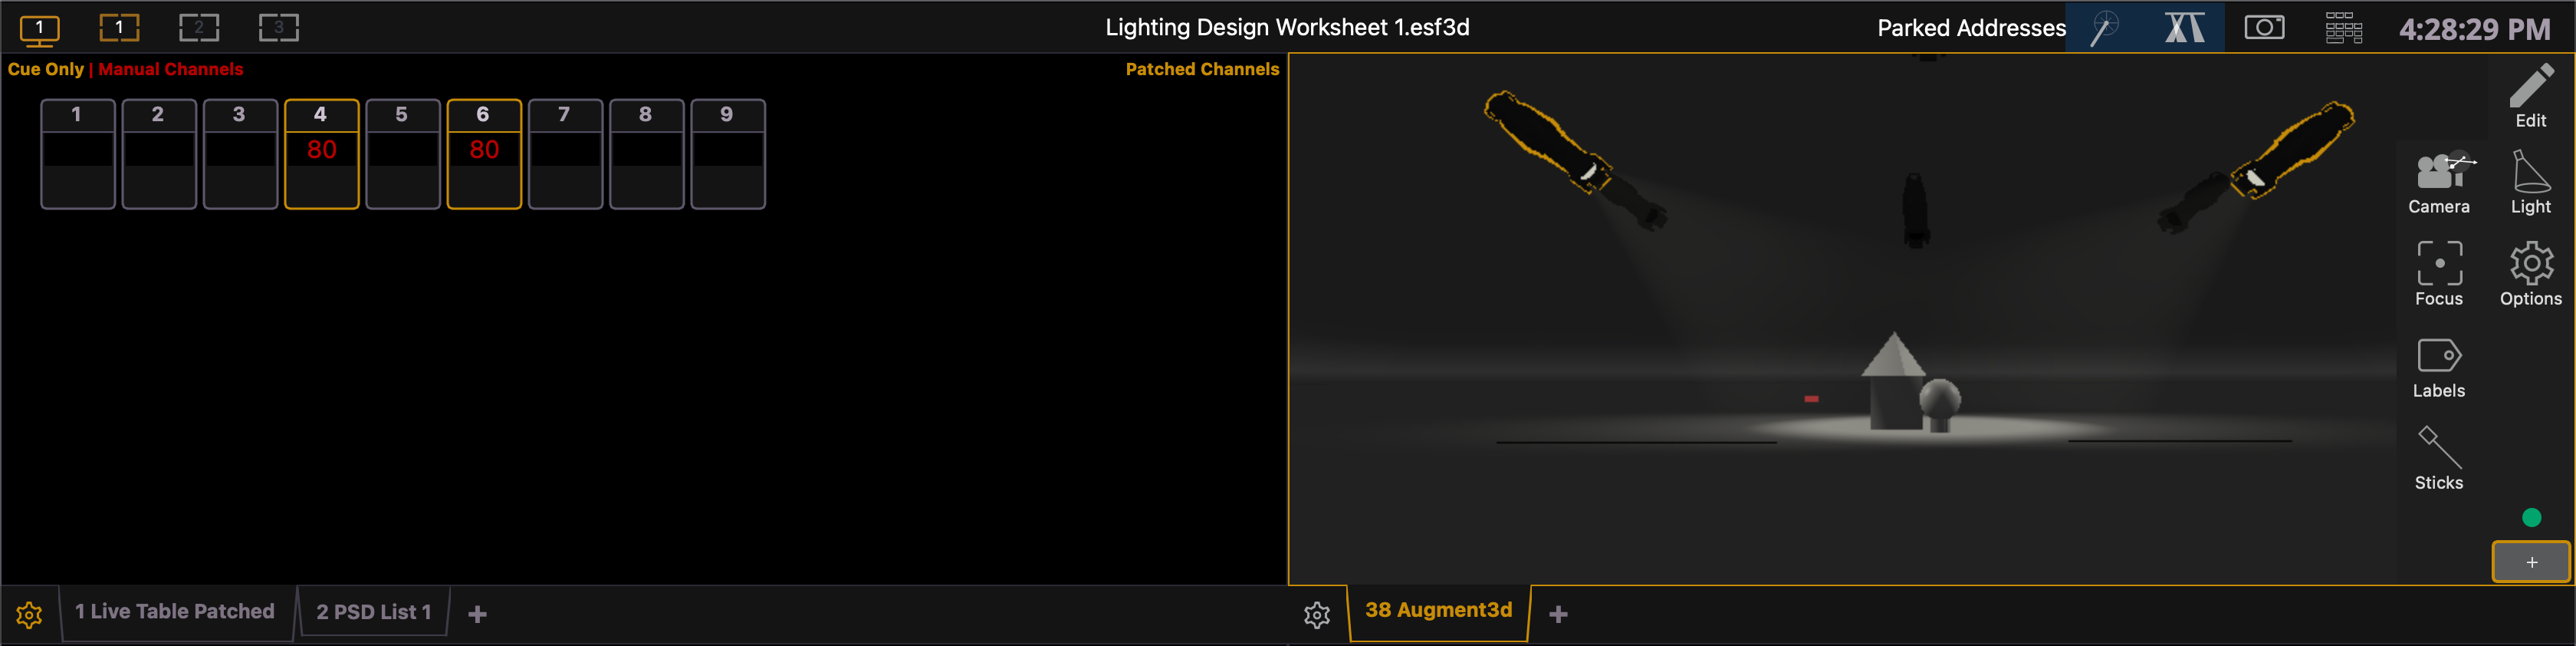
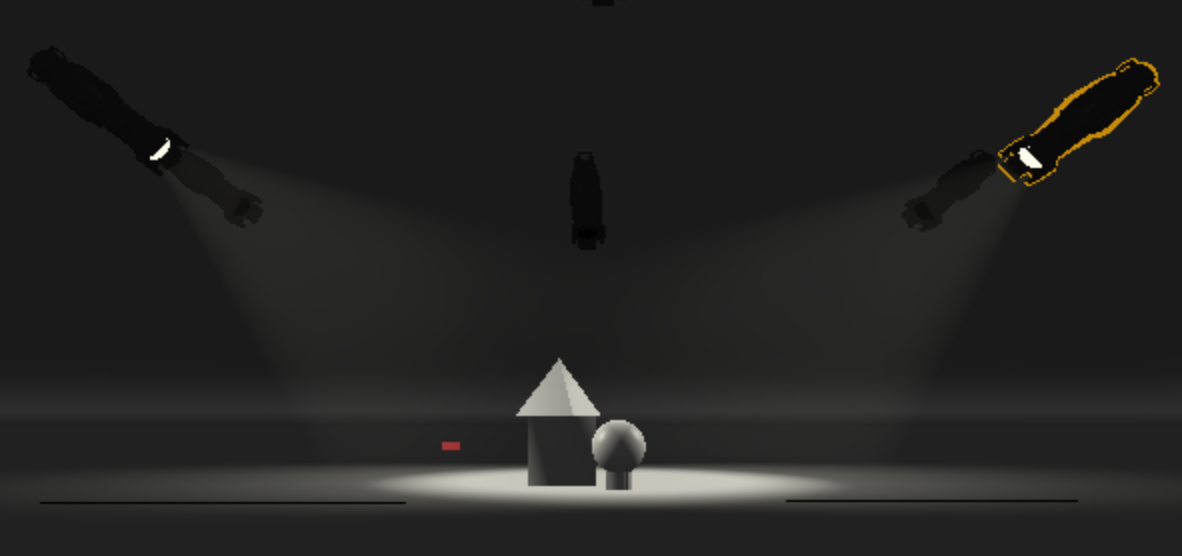
Once you hit enter, two lights should turn on on your Augment3d visualizer and channels 4 and 6 should now have numbers in your Live Table display.
That’s nice; but let’s say that it’s too bright. We could press 4 and 6 again, but EOS tries to help make things efficient. If you press the [@] button or the letter A on your keyboard, EOS will assume that you mean to adjust the channels you just used. Next press [Full] or F on your keyboard and press [Enter]. This will put the lights to their fullest intensity, maximum brightness.
Good, but I would say that the image is a little flat, that we want some contrast; so let us take channel 6 to 50%. To start, press [Shift]+[Clear] (or Shift + Delete / Backspace on your keyboard). This will clear the entire command line, allowing you to create a brand new command.
This full clear command can also be nice if you type something incorrect. For example, if you were to type Chan 6 then press the [Part] button, that command doesn’t make any sense to the EOS system, so will pop up with a “Syntax Error” – meaning the language is wrong. Clearing the command line and starting over is something the best thing to do.

Okay. Tangent over.
So, this time let’s use your computer keyboard. Press the number 6. EOS will assume that you mean Channel 6 so will automatically put that into the command line. Next press the [@] button and then press the number 5 and then [Enter]. Once committed you’ll notice that the command line switched to 50%.

EOS assumes that any number less than 10 is just a quicker way to say 10, 20, 30, and so on. To set a value that is less than 10, use the number zero in front of that value. So if we wanted 5%, not 50%, we would type Chan 6 @ 05 Enter.
Alright. That’s how you use channels. At least for now …