Follows and Hangs
Sometimes we want to create sequences of cues that automatically execute. This could be something like a button at the end of a musical number that automatically shifts into a blackout. This could a fogger that goes full blast for 10 seconds then stops. This could be a series of lights that follow one another in a pattern. Even if you can’t think of your own examples; it’s important to know how to automatically transition from one cue to another … because one day you’ll need to!
EOS has two ways to automatically transition to the next cue; Follow and Hang.
A Follow is a countdown that starts after starting the current cue.
A Hang is a countdown that starts after finishing the current cue.
Once the Follow or Hang has completed its countdown, the next cue will automatically execute; similar to if you pressed the GO button again.
I have a few cue sequences for you to help illustrate this concept.
Go go cue 25 – which is a blackout.
Now step forward through the following cues – 25.1, 25.2, 25.3, 25.4, 25.5. You’ll see that each cue adds a light to the front of the stage. The idea is to automatically add these lights, one after the other. The next cue, Cue 26, is a blackout.
Now go to Cue 27 which will start a cue sequence. Here we have the exact same looks, but these cues implement a Follow of 1.5 seconds. You can see this specified in the Fw/Hg column. You’ll also notice that Cues 27.2 through 27.5 have arrows next to them; meaning they will automatically execute without a GO command.
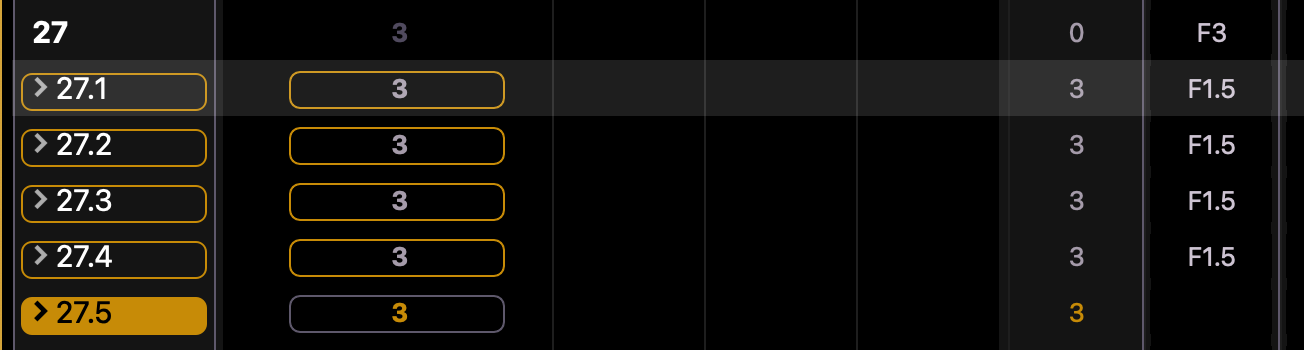
Hopefully you saw that once a cue starts, it begins counting down its follow time, and then executes. Because the follow time is less than the fade time itself – we see an overlap in timing. Let’s try slowing down the follows to a time of 4 seconds. So press [Cue] [27.1] [Thru] [27.4] … (by the way, we don’t want to include 27.5 because it shouldn’t automatically follow, it’s just the last cue in the sequence).
Once we’ve started specifying a cue, you’ll see a [Fw/Hg] button appear in the bottom right hand corner soft keys.
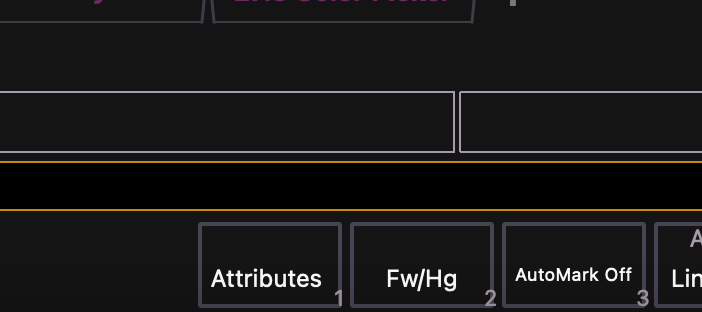
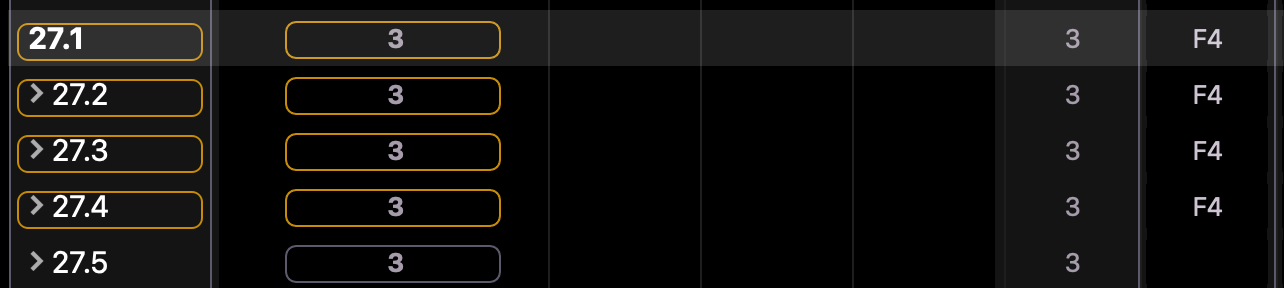
Pressing this button will toggle between Follow and Hang. So press it once and specify a time of 4 seconds, then press enter. Or the complete command would be [Cue] [27.1] [Thru] [27.4] [Follow] [4] [Enter].

All the cues will now switch over from a F1.5 to a F4.
Try stepping into the cue sequence again. This time you’ll a longer count down, creating a 1 second overlap between cues.
Let’s try it again, this time giving it a Follow time of 0.5.

Now our transition will be much quicker.
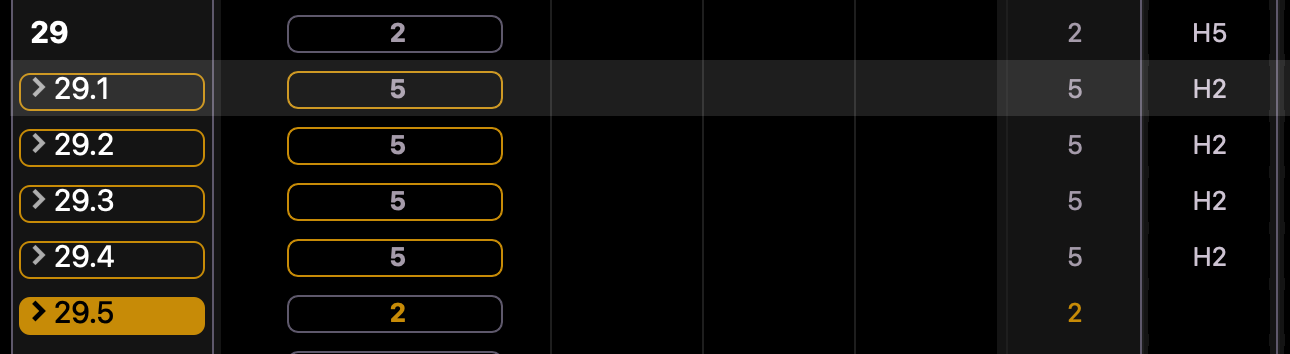
The other version, a Hang, is similar. Go to Cue 28, then step into the same sequence by advancing to Cue 29. Again, sometimes watching the PSD helps illustrate the sequence better than watching the stage. Here you’ll see each cue finish its duration, then start counting down the hang time.
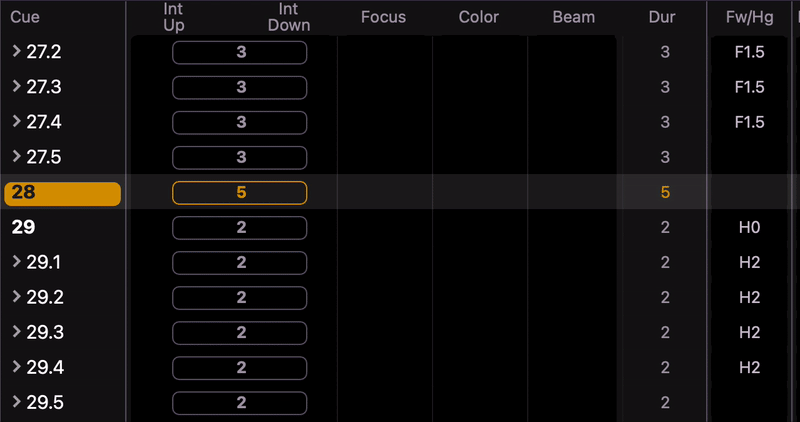
To start with Hangs, let’s first look at clearing a Hang (or clearing a Follow). As is with everything else, proving a “nothing” value is how we clear an existing Hang. Remember that the [Fw/Hg] button toggles between Follow and Hang. So for Cue 29, press [Cue] [29] [Fw/Hg] [Fw/Hg] [Enter].

This will clear the hang, so we’ll no longer see the H0 at the end of Cue 29’s row.

Good, now let’s practice setting a Hang time, so change Cue 29’s hang time to be a time of 5, or [Cue] [29] [Fw/Hg] [Fw/Hg] [5] [Enter].

Functionally, Cues 29.1 through 29.5 are working the same as a Follow of 4 seconds (2 second Fade + 2 second Hang). But a Hang is handy because it’s relative to the timing of the cue itself. So let’s change the time of 29.1 through 29.5 to be a time of 5; [Cue] [29.1] [Thru] [29.5] [Time] [5] [Enter]. This sequence will now function like a Follow of 7 – or rather, the time we wait after the cue has completed will persist, despite changes in the cue’s timing itself. Handy.