

Cue Timing
So far we’ve just let our cues have the timing set by default. But the ability to define that pace at which one look changes to another is a vital part of crafting a journey for our audiences. Timing can press us from one scene into the next. Timing can let a moment hang and rest on our hearts. Timing can be bold. Timing can be nuanced. Timing is a powerful tool.
In this lesson we’ll focus on timing for a channel’s intensity, and intensity only – so for now; just pay attention to the “Int Up” and “Int Down” columns.
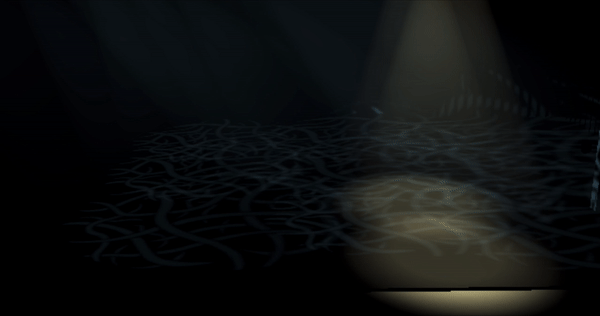
If you open one of your snapshots (either the Small, Medium, or Large Screen setup); you should be able to see both the PSD and Augment3d at the same time. This will allow you to see both the cue transition as well as the change happening on the stage … both at the same time. If you don’t see them together, either use one of the snapshots or bring up the PSD manually. Either’s fine. You’ll just want to see both.
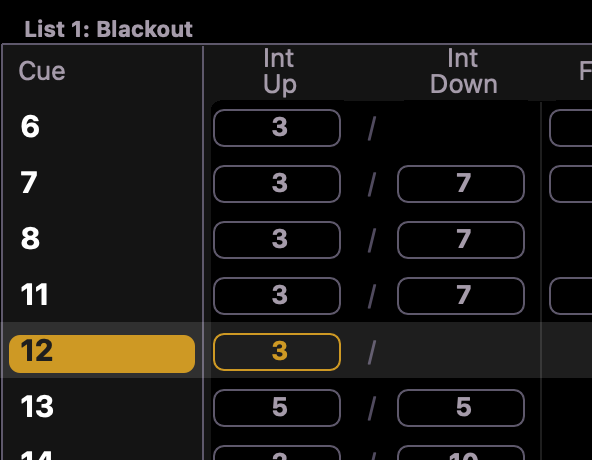
Let’s start by going to Cue 11; a Blackout. If you hit go to transition to Cue 12 – you’ll see lights come up over 3 seconds. We know that because the column next to the Cue has the number 3 next to it.

If you transition to the next cue, we’ll switch the set of lights that are on over a slower pace, over 5 seconds.

We can change the timing to something shorter, like 1 second, by pressing [Cue] [12] [Time] [1] [Enter] – or the [Time] button is the letter “I” on your keyboard. Go back to Cue 11, then step forward again to Cue 12. The transition will happen quickly this time; over 1 second.

Likewise, we could extend the transition to something longer. Try setting the Time to 20 seconds and try it again. Much slower, yes?

Any fade cue transitions a channel from one value to another value – but when discussing Intensity Fades we actually care about values that are increasing and values that are decreasing. We can actually split our fade times; specifying one time for lights that are getting brighter and one time for lights that are getting darker.
If you transition from Cue 13 to 14; you’ll see that we can quickly bring up new lights over 2 seconds and slowly lower existing lights over 10 seconds.
If you transition from Cue 14 to 15; you’ll see that we can slowly bring up new lights over 10 seconds and quickly lower existing lights over 2 seconds.
This type of timing is called a “Split Fade”. This is one of the most common ways to gain nuance in timing – to separate the timing of the lights entering from the lights exiting. Specifying a split time works in much the same way; except this time we need to provide two times, separated with the [/] key. Let’s try altering the timing on Cue 16 to be 0 seconds up and 10 seconds down; or, [Cue] [16] [Time] [0] [/] [10] [Enter].
Now, try it out by pressing the GO button.
Let’s illustrate one more part of timing. When nothing happens.
In our last few cues, we’ve gone back and forth and back and forth between two looks. But what if there are no lights coming up or no lights going out.
You should currently be in Cue 16. The next cue, Cue 17, should be the opposite look. So let’s mess up our pattern. The two lights on stage right should be on, they’re channels 12 and 17. Take these to 80%. And now update both 16 and 17; [Update] [Cue] [16] [Thru] [17] [Enter].
You’ll now see that Cue 17 has no Int Down time. Because it has no channels in which the intensity is going down.
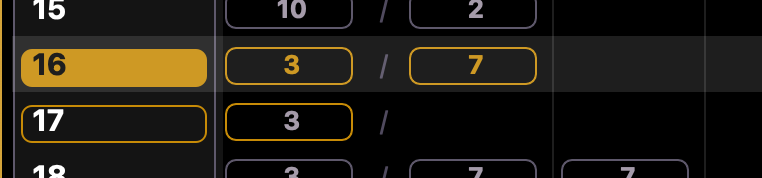
More specifically; it’s just straight up blank. This happens when a single time (rather than a split fade) has been specified or the cue timing is the default time. Give Cue 17 a split time now; perhaps 5 / 10.
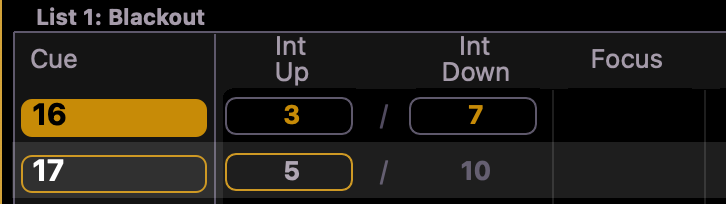
Now you’ll see that the Int Down time is grayed out. This is because we specified a time; but nothing in the cue is lowering in intensity.
This isn’t a way to change timing or add nuance; but it is an important visual signifier to help you understand how EOS displays information.